
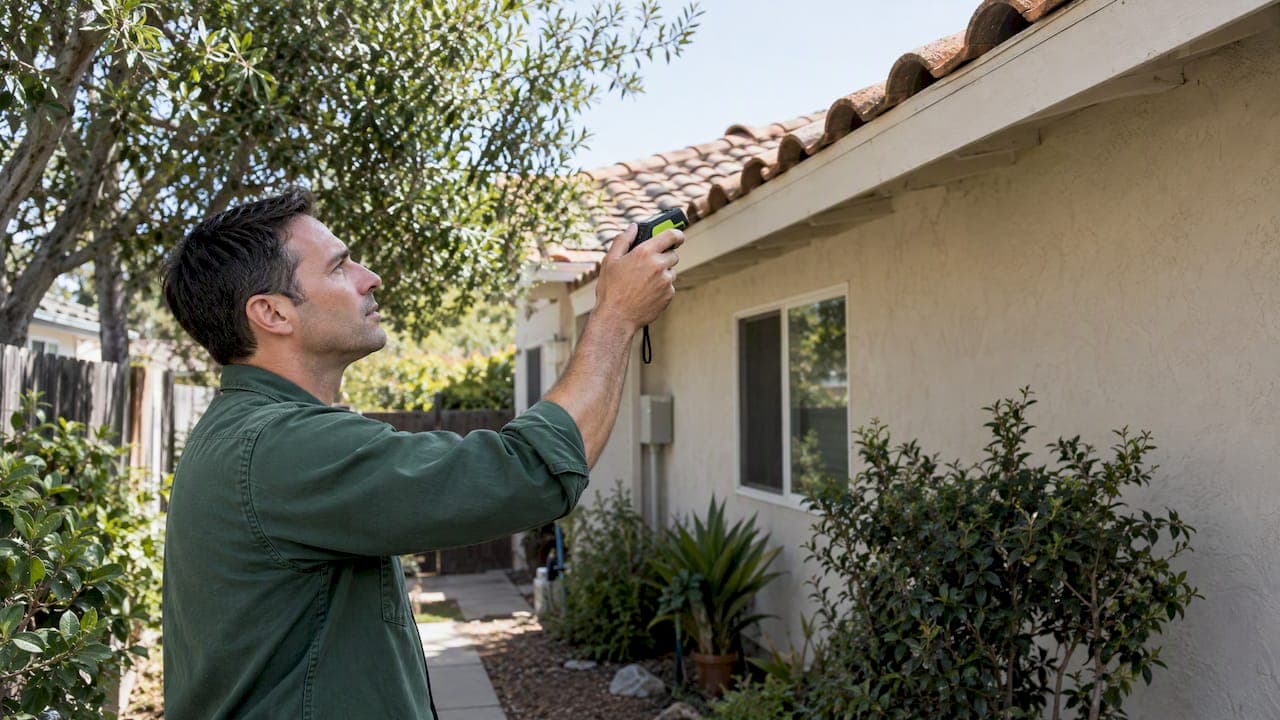

A solar site assessment is the on-site and remote evaluation that confirms whether your roof, electrical system, and property can support a solar installation, and it delivers a concrete outcome: verified roof geometry, a shading summary, an electrical snapshot, and a clear list of next steps toward a permit-ready design. Online tools can estimate your potential, but a qualified, insured installer should confirm the details before you commit.
TL;DR:
- Satellite tools can estimate irradiance and panel layout, but they cannot confirm a two layer roof, a maxed 100 amp panel, or winter chimney shadows.
- Some builder checklists use roughly 75% of optimal solar resource as a qualification threshold, so verify seasonal tree and structure shading on site.
- If your roof is more than 15 years old, ask whether reroofing first is cheaper than designing around an aging deck.
- A report with dated measurements, roof photos, shading data, and electrical diagram inputs gives designers and inspectors the evidence needed to avoid follow up requests.
Table of Contents
- What a Solar Site Assessment Covers and Why It Matters
- The Assessment Process: From Remote Scoping to Final Documentation
- Solar Site Survey Checklist: What to Confirm Before and During the Visit
- Tools and Remote Assessments: What They Handle, and What They Don’t
- Roof Condition and Structural Factors That Determine Installability
- Safety, Permitting Data, and What a Usable Survey Report Includes
- Indigo Energy’s Practitioner Perspective on Assessments
- What Homeowners Consistently Underestimate About Site Assessments
- Ready for an On-Site Assessment? Here’s How We Help
- FAQ
- Sources
What a Solar Site Assessment Covers and Why It Matters
A thorough assessment looks at more than your roof’s square footage. It covers geometry, shading, your electrical service, structural condition, equipment access, and the permitting data your local jurisdiction requires. Each of these feeds directly into system sizing, your final price, and how quickly your project clears inspection.
The U.S. Department of Energy advises that a proper assessment verifies roof size, condition, age, orientation, local weather patterns, and shading from trees or nearby structures, and recommends having a qualified, insured installer confirm these details rather than relying on remote tools alone.
An assessment typically documents:
- Roof plane dimensions, pitch, and orientation relative to true south
- Shading sources, including trees, chimneys, and neighboring structures
- Electrical panel rating, meter location, and available capacity
- Structural condition of the roof deck and framing
- Access points for installation crews and required equipment clearances
Skipping any of these steps risks a design that looks good on paper but fails inspection or underperforms once installed.
The Assessment Process: From Remote Scoping to Final Documentation
A well-run assessment moves through three phases, and understanding the sequence helps you know what to expect and when.
- Remote scoping. Installers start with aerial imagery and tools like PVWatts to model roof area, solar irradiance, and a preliminary system size. This stage narrows down likely panel layouts and flags obvious shading or orientation problems before anyone sets foot on your property.
- Scheduling the field visit. Once remote data suggests your property is a good candidate, the installer defines what the on-site visit needs to measure: exact roof dimensions, shading angles at different times of day, and electrical panel specifics.
- On-site inspection. A technician measures roof planes, photographs shading obstructions from multiple corners, identifies your main breaker rating, and notes the inverter’s likely location relative to your panel.
- Documentation handoff. Photos, measurements, and notes get compiled into a package that a system designer can use without having visited the property, including any unresolved items flagged for a structural or electrical engineer.
Items that raise questions, like an aging roof deck or an undersized panel, get routed to a specialist before final design work begins. This keeps a borderline issue from turning into an expensive mid-project redesign.
Pro Tip: Ask your installer for dated photos and measurements from your assessment. You will want this record if you ever reroof, add a battery, or sell your home.
Solar Site Survey Checklist: What to Confirm Before and During the Visit
Having the right information ready speeds up your assessment considerably. Here is what a thorough survey typically records, and what you can gather in advance:
- Site identity and scope. Property address, roof access notes, and the homeowner’s energy goals (offset percentage, battery interest, future EV charging).
- Roof data. Plane dimensions, pitch, roofing material, age, and any visible defects like curling shingles or soft spots.
- Shading documentation. Photos of tree lines, chimneys, or adjacent rooflines, along with sunpath or percent-shading readings taken at the site.
- Electrical information. Main breaker amperage, meter type and location, and the distance between the proposed inverter site and the main panel.
- Access and safety notes. Roof pitch steepness, fall-protection anchor points, and a photo register tied to each measurement.
Pulling together recent utility bills and any past roofing permits before your appointment can shave real time off the process.
Tools and Remote Assessments: What They Handle, and What They Don’t
Remote tools are genuinely useful for the first pass. PVWatts and similar platforms estimate roof area, irradiance, and preliminary system sizing using satellite and LiDAR data, which is how most homeowners first learn whether their property is worth pursuing.
Field instruments pick up where remote data leaves off:
- Solar Pathfinder and SunEye devices capture precise shading angles throughout the day
- Drone imaging documents hard-to-reach roof sections and obstructions
- Physical measurements confirm what aerial imagery can only estimate
Statistic Callout: DOE guidance points to roughly 75% of optimal solar resource potential as a threshold some builder checklists use when qualifying a site as renewable energy ready. That threshold illustrates why shading nuance matters: a roof that looks clear on satellite imagery can still fall short once tree growth or a neighboring addition is accounted for on site.
The practical approach is remote scoping first, then targeted field verification of anything the remote tools can’t resolve with certainty.
Roof Condition and Structural Factors That Determine Installability
Your roof has to physically support the array for decades, which is why structural review matters as much as sizing. Age, the number of existing shingle layers, decking condition, and framing all factor into whether your roof is ready now or needs attention first.

Installers calculate dead load (the panels and racking), live load (maintenance crews), and wind or snow load based on your region, per standards covered in certified load-rating guidance. When a roof’s framing is marginal or spans are unusual, that calculation gets handed to a structural engineer before design proceeds.
Fire access requirements also shape your layout. Most jurisdictions require clear pathways and setbacks so firefighters can safely access the roof.
- Request photos of your decking and framing from underneath, if accessible
- Ask for the measured spans used in any load calculation
- Confirm in writing whether reroofing is recommended before installation
Pro Tip: If your roof is more than 15 years old, ask your installer whether reroofing before installation makes more financial sense than working around an aging deck.
Safety, Permitting Data, and What a Usable Survey Report Includes
Roof access carries fall risk, so a professional assessment includes documented fall protection and safe work practices throughout the visit. That safety discipline also produces the records your permit application needs.
A permit-ready report typically includes a site plan, inputs for a single-line electrical diagram, your shading data, and a photo register keyed to each measurement. The DOE’s PV system owner’s guide emphasizes that field audits and documented records, including design documents and photo registers, are essential for identifying issues before they become long-term performance or safety problems.
- Dated photos and measurements tied to each roof plane
- Documented assumptions and any items still unresolved at handoff
- QA checks confirming the data matches what designers will use
A thorough, well-documented survey shortens your permitting timeline because inspectors see the exact data they need the first time, without follow-up requests.
Indigo Energy’s Practitioner Perspective on Assessments
We run assessments as a hybrid process: remote scoping for initial sizing, then a site visit to verify the details that remote tools can’t capture, like your exact panel capacity or shaded inverter space. Our deliverables include permitting package support and notes on battery or EV charging feasibility where relevant, because those decisions are easier to make correctly during the original assessment than to retrofit later.
What Homeowners Consistently Underestimate About Site Assessments
The conventional advice treats a solar estimate from an app as a near-final answer, and that’s where most homeowners get misled. A rooftop tool can tell you your roof faces the right direction and gets good sun exposure, but it cannot see a two-layer shingle roof, a 100-amp panel that’s already maxed out, or a chimney shadow that only matters in December.
The bigger problem is sequencing. Homeowners often shop for price quotes before anyone has verified whether their roof or panel can even support the system being quoted, which sets up change orders and delays later. The site assessment isn’t a formality that happens after you choose an installer. It’s the step that should shape which system and which price are realistic in the first place.
If you take one thing from this: treat the on-site visit as non-negotiable, not an upsell. A remote estimate is a conversation starter, not a design.
— Curtis Williamson
Ready for an On-Site Assessment? Here’s How We Help
To get a quote based only on satellite imagery means you’re negotiating with incomplete information. We send a technician to verify your roof condition, electrical capacity, and shading in person, then build your design around what we actually find, not just what a tool estimates.
Our residential solar installation service includes the full assessment and permitting support, and we’ll flag early whether battery storage or EV charging makes sense to add to your system. If your property is a commercial site instead, our services overview covers those options as well.
Hiring a qualified, insured installer for your assessment protects you from the costly surprises that show up when a system gets designed around assumptions instead of measurements. Reach out through our residential services page to schedule your on-site visit and get a quote based on your actual roof.
FAQ
How do I do a solar site assessment?
A solar site assessment starts with remote scoping using aerial imagery and tools like PVWatts to estimate your roof’s solar potential, followed by an on-site visit where a technician measures your roof, documents shading, and checks your electrical panel capacity. Homeowners should have a qualified, insured installer complete the on-site portion, since the Department of Energy notes that remote tools only provide preliminary estimates.
What is included in a solar site survey checklist?
A solar site survey checklist covers roof plane dimensions, pitch, and material condition, shading documentation from trees or structures, electrical panel capacity and inverter location, and access or safety notes for the installation crew. Assessors typically back these items up with dated photos and measurements for the design and permitting package.
What is a solar site survey?
A solar site survey is the on-site inspection portion of a broader solar assessment, where a technician physically verifies roof condition, measures shading angles, and confirms your electrical system’s capacity. It produces the documented, photo-backed data that a system designer needs to finalize your layout and that your permitting office requires for approval.
How does local climate affect my solar assessment?
Local weather patterns affect how much usable sunlight your roof receives throughout the year, which is one of the specific factors the Department of Energy recommends verifying during an assessment. Seasonal shading changes, like a tree that only blocks sun in winter, also get captured during the on-site visit rather than through remote imagery alone.
Does my electrical panel need an upgrade for solar?
Your installer checks your main breaker rating and available capacity during the assessment to determine whether your existing panel can support a solar system, or whether an upgrade is needed first. This evaluation happens on site because panel capacity cannot be reliably confirmed through remote or aerial tools.